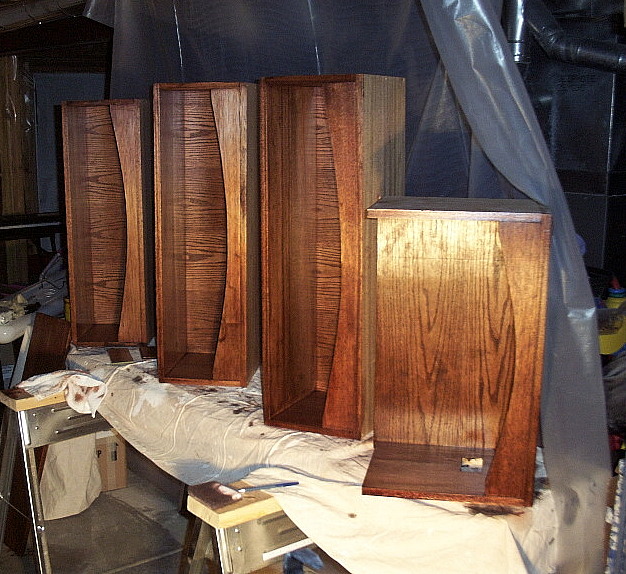
Here I'm staining all the custom cabinetry that my neighbor, Steve, built. There will be three coats of different color stains plus three coats of hand-rubbed polyurethane to get the desired color and texture I want.
CLICK ON PICTURE FOR LARGER VIEW
|

|
|
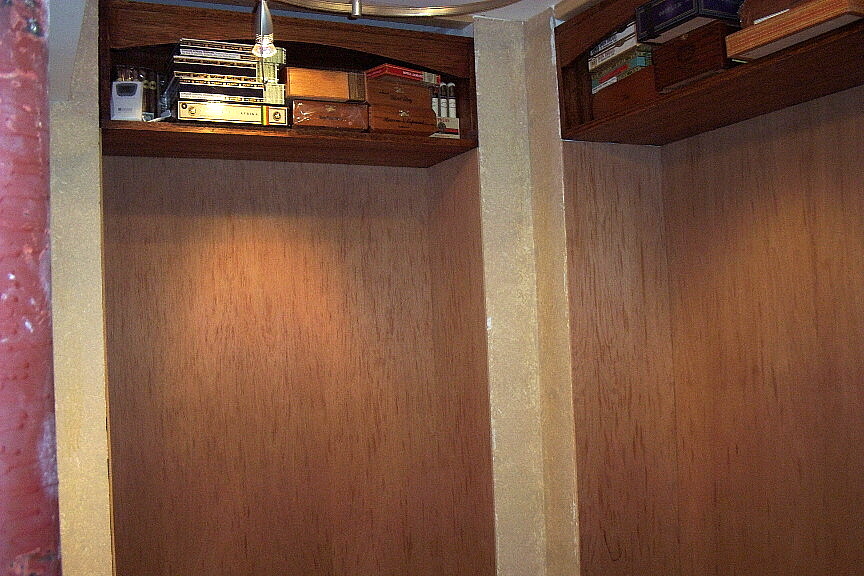
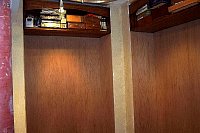
Once the custom cabinets are installed, the Spanish Cedar panels are cut and fit into place in the recessed shelving areas. There are three sides to every recessed area, and there are four recessed areas in all.
CLICK ON PICTURE FOR LARGER VIEW
|
|
|
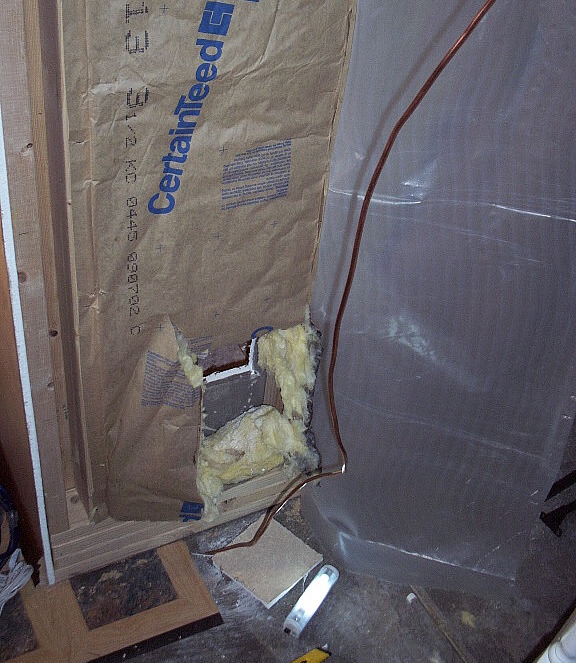
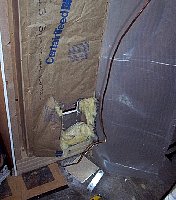
Buying a dozen gallons of distilled water every week for the humidifier was too much maintenance, so I decided to install a filtered water line myself. Here, looking a the right outside wall, I cut through the wall, and installed copper tubing and a valve access panel.
CLICK ON PICTURE FOR LARGER VIEW
|
|
|
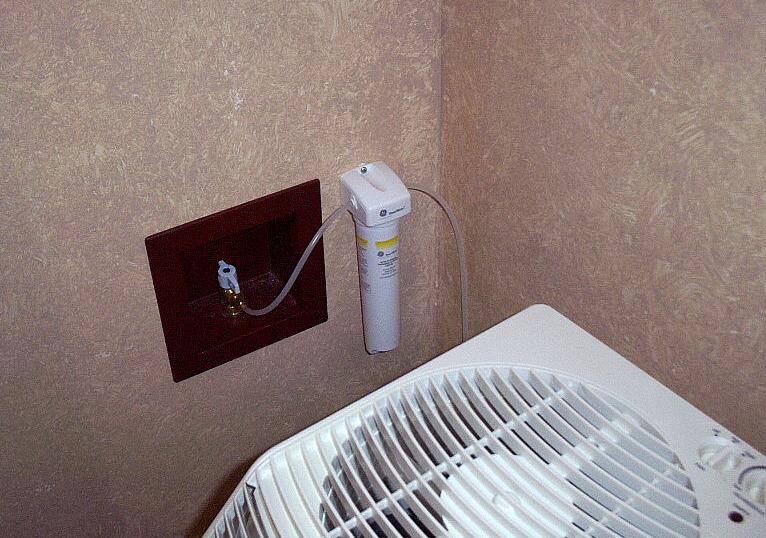
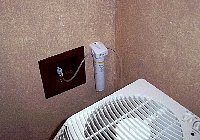
On the inside of the humidor, the valve access panel is trimmed out and painted. The water filter to the right keeps the water clean from contaminants.
CLICK ON PICTURE FOR LARGER VIEW
|
|
|
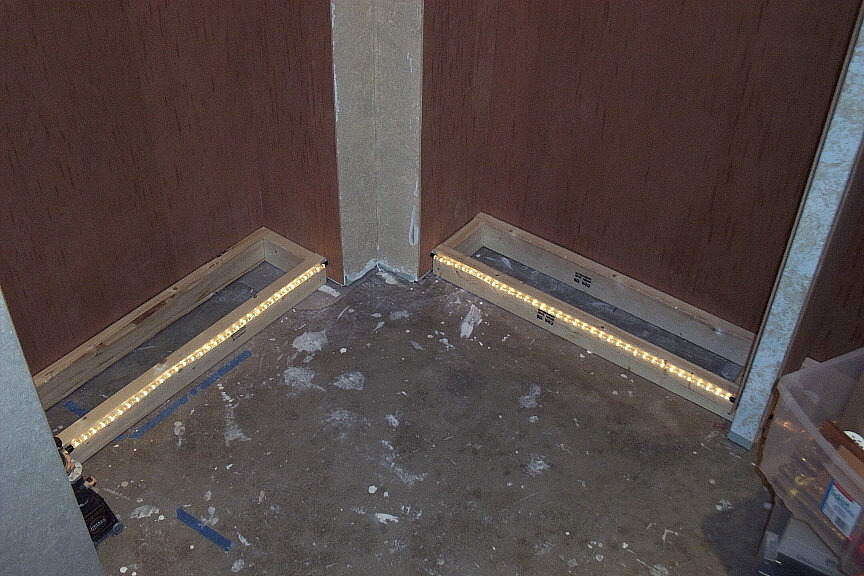
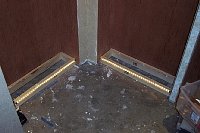
The bottom shelf will have a recessed illuminated toe kick. This is the support for the bottom shelf before all of the toe kick pieces are assembled onto it. The rope light will be concealed by the overhang of the bottom shelf.
CLICK ON PICTURE FOR LARGER VIEW
|
|
|
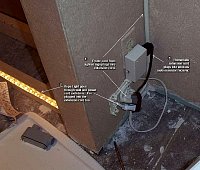
In an effort to keep wires concealed, I used a surface-mount box to hide the rope-light wires and other power cables going into the motion-sensor receiver.
CLICK ON PICTURE FOR LARGER VIEW
|
|
|
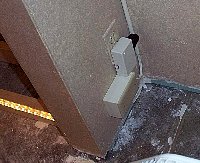
Once all the wires are snipped, connected, and tucked, I was able to put the face plate on. Things look much neater now.
CLICK ON PICTURE FOR LARGER VIEW
|
|
|
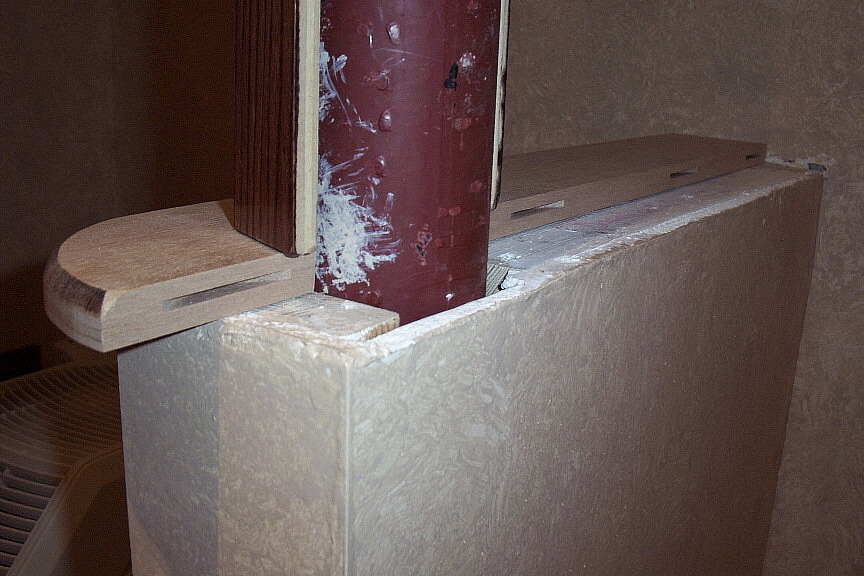
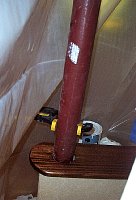
One of my biggest concerns was how to make a shelve 'wrap' around the steel pole. My neighbor, Steve, split the shelf in half, and used a biscuit joiner to join the two halves together. You can see in the photo the biscuit holes in the one half. .
CLICK ON PICTURE FOR LARGER VIEW
|
|
|
Once the two shelf halves are joined together, sanded and stained, it looks like one solid piece of wood. The seam is undetectable.
CLICK ON PICTURE FOR LARGER VIEW
|
|
|
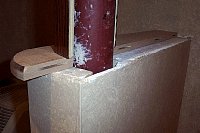
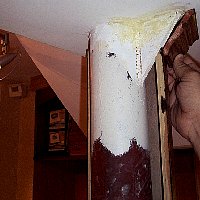
My other concern was how to hide the steel angled support piece. I used crown moulding to conceal this mess and you can see in the photo that it just barely fits.
CLICK ON PICTURE FOR LARGER VIEW
|
|
|
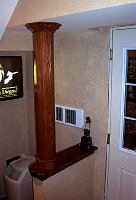
The pole and half-wall is finally finished. There is base moulding on the bottom of the pole and crown moulding on the top. Also added was a moulding strip just below the shelf.
CLICK ON PICTURE FOR LARGER VIEW
|
|
|
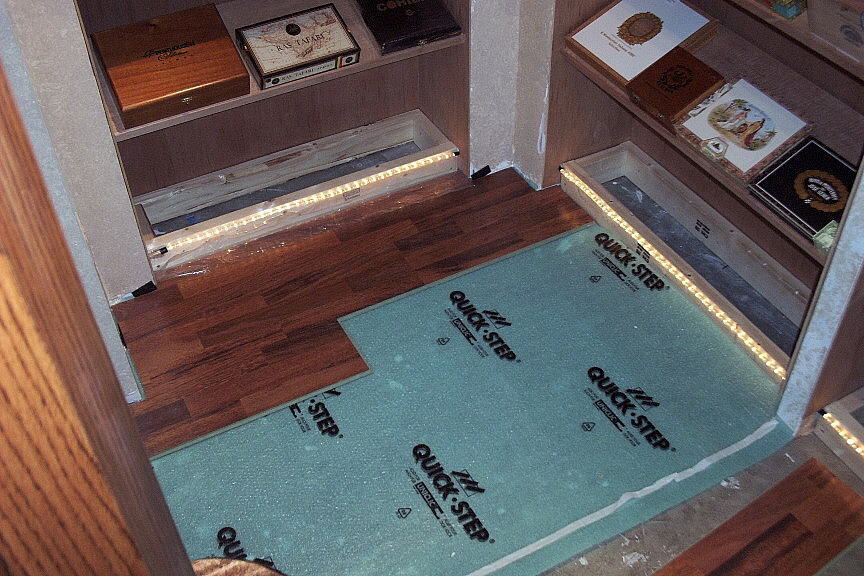
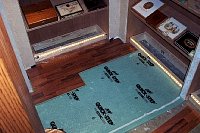
I'm laying down Glueless Mirabau laminate flooring by Uniclick. This stuff installs very quickly, and this particular brand/style is moisture resistant (important in a humidor). Also notice that the Spanish Cedar Shelves have been installed at 25-degree angles. I couldn't wait to place some of my box collections on the shelves.
CLICK ON PICTURE FOR LARGER VIEW
|
|
|
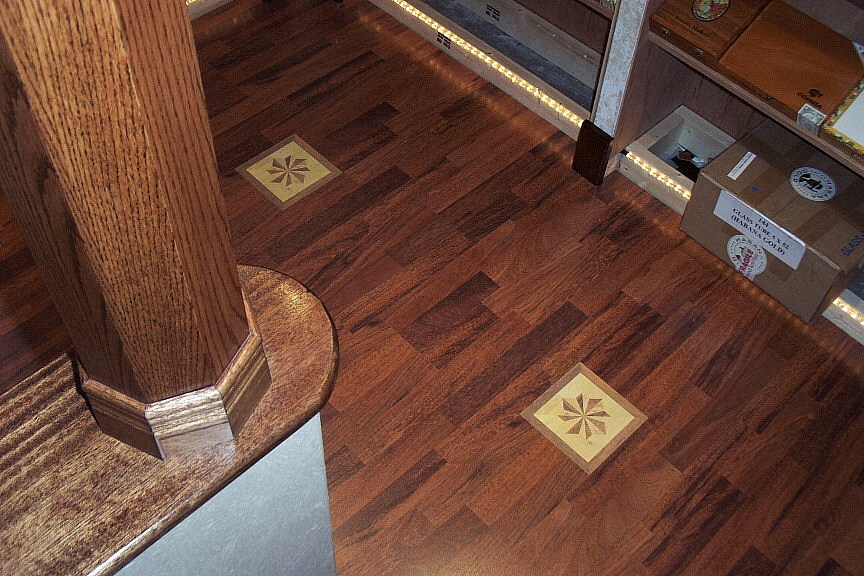
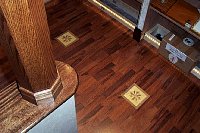
I was able to finish the flooring in one afternoon, complete with accent tiles.
CLICK ON PICTURE FOR LARGER VIEW
|
|