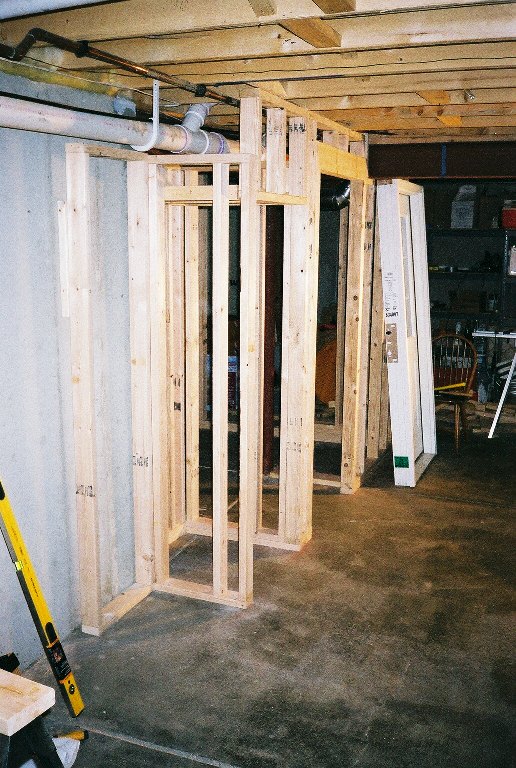
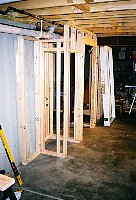
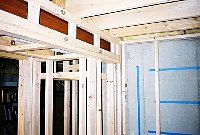
Here's a wide-shot of the rough framing. The corner on the left is just a little place to display some artwork and the Cutrone Statue.
CLICK ON PICTURE FOR LARGER VIEW
|
|
|
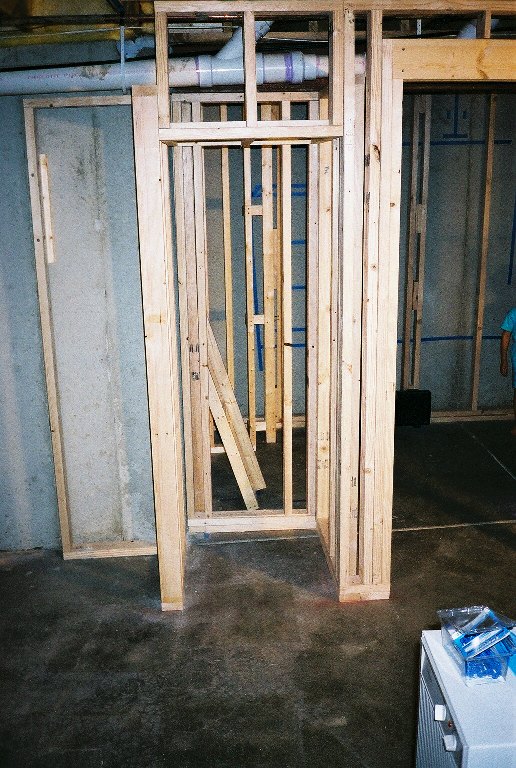
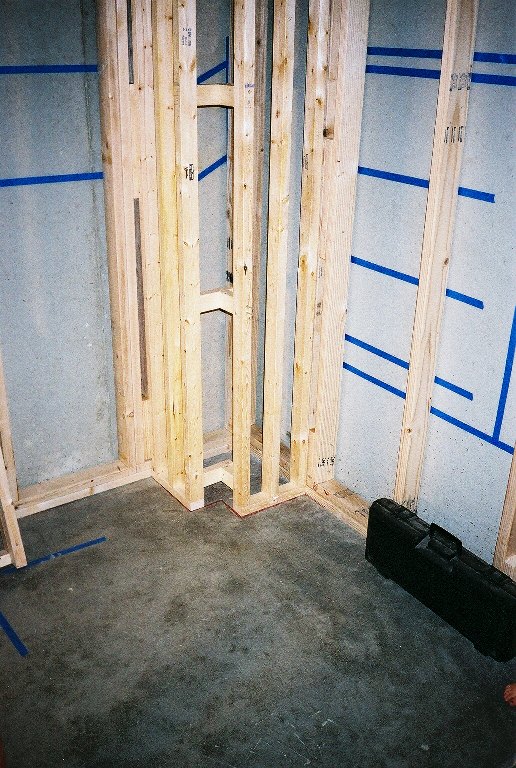
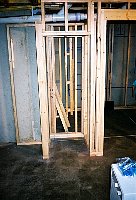
Here's the rough framing of the wine cooler closet. There was little margin for error so I think I remeasured everything a dozen times before assembling the framing together.
CLICK ON PICTURE FOR LARGER VIEW
|
|
|
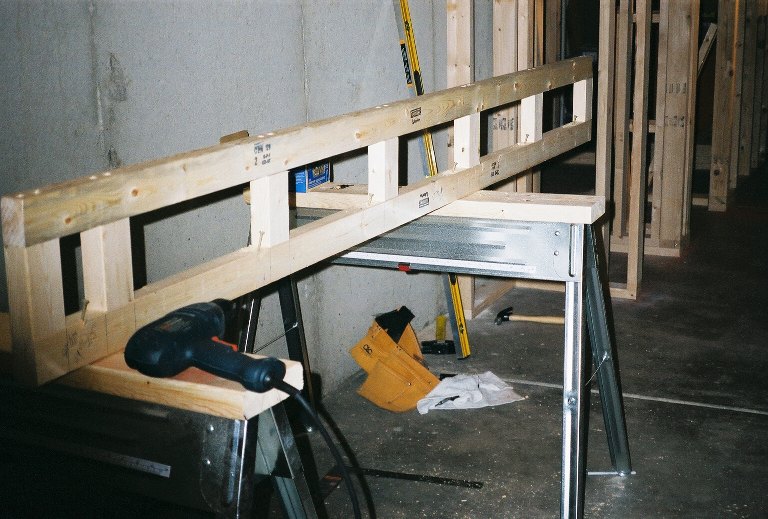
For the ceiling, I build most of the pieces as large objects before assembling them to the joist. Here, I'm building a soffit to hide an I-beam.
CLICK ON PICTURE FOR LARGER VIEW
|

|
|
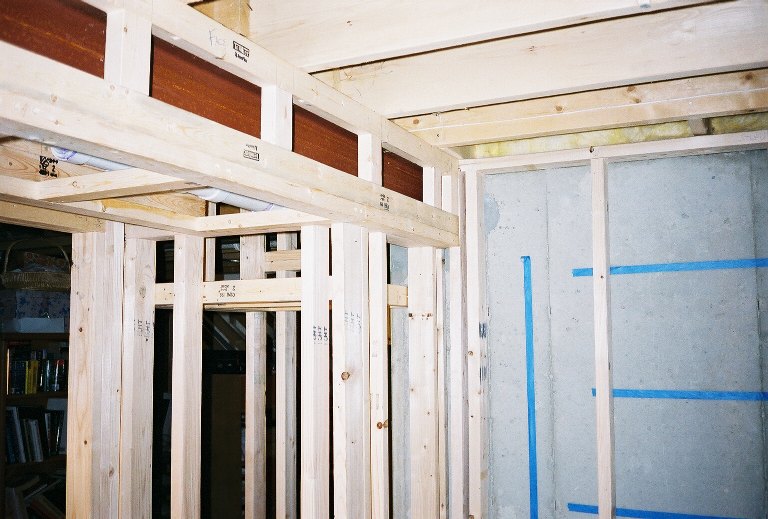
Here, the soffit is attached to the joists to conceal the I-beam. I used 2x3's, and even that was probably overkill.
CLICK ON PICTURE FOR LARGER VIEW
|
|
|
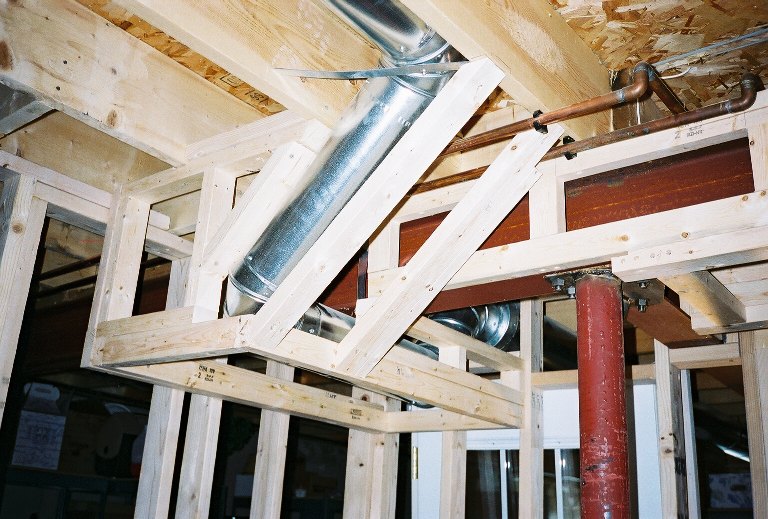
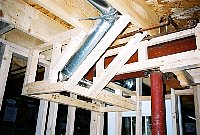
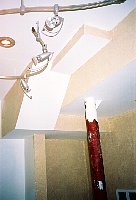
Here's a more complicated soffit frame. I didn't want to loose a lot of headroom space, so I conformed to the angled ventilation pipes and I-beams as close as posslble.
CLICK ON PICTURE FOR LARGER VIEW
|
|
|
One of the last things I did in the rough-framing stage was to build and attach the corners of the room. Once this is trimmed, it will give the appearance of build-in sunken custom shelving.
CLICK ON PICTURE FOR LARGER VIEW
|

|
|
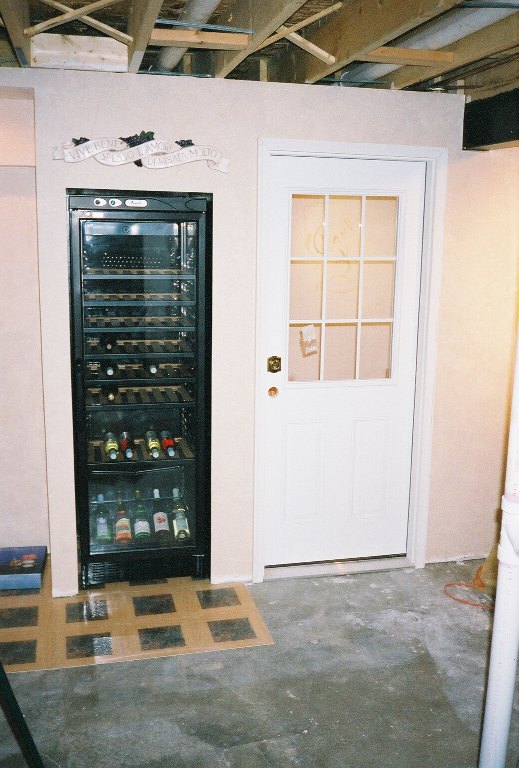
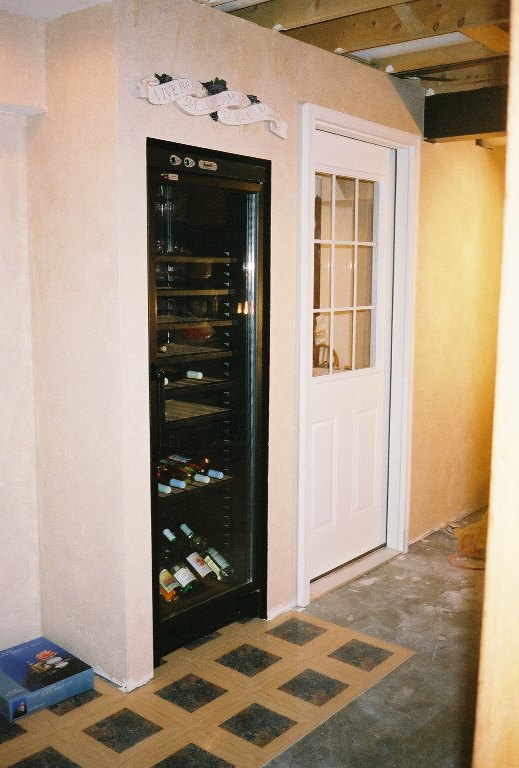
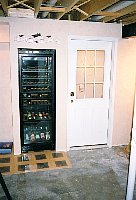
Here's the semi-finished wine cooler section. There's exactly 1" around the cooler for air circulation, and the inside of the closet is painted black to give a "trim" effect to the unit. I still have to level the Cooler, and add baseboard trim. I also had to install the flooring in that area so the cooler can go on top of it.
CLICK ON PICTURE FOR LARGER VIEW
|
|
|
You can see the I-beam going right through the room at the top-right, but the ceiling soffits are insulated and sealed to keep the climate controlled.
CLICK ON PICTURE FOR LARGER VIEW
|
|
|
Here's another look at the soffits when finished. It was a lot of intricate work as far as rough framing was concerned, but it was worth it. Not only is the ceiling insulated and sealed, but the multi-layered look adds a nice texture to this small room.
CLICK ON PICTURE FOR LARGER VIEW
|
|
|
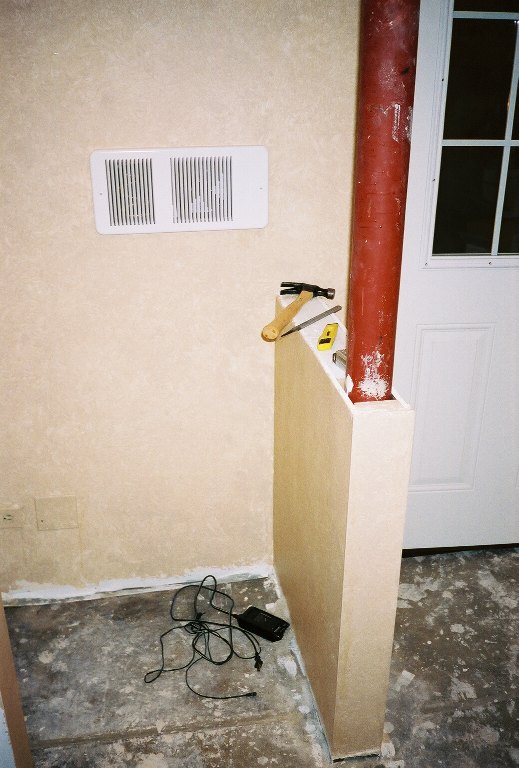
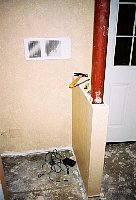
This is the half-wall. The poll will be finished in a Mahogany wrap, with a beveled mahogany shelf. To the left there will be a humidifier unit. Build into the wall is the 240v heater. Both the humidifier and heater are thermo/humistatically controlled by a unit on the opposite side of the door.
CLICK ON PICTURE FOR LARGER VIEW
|
|
|
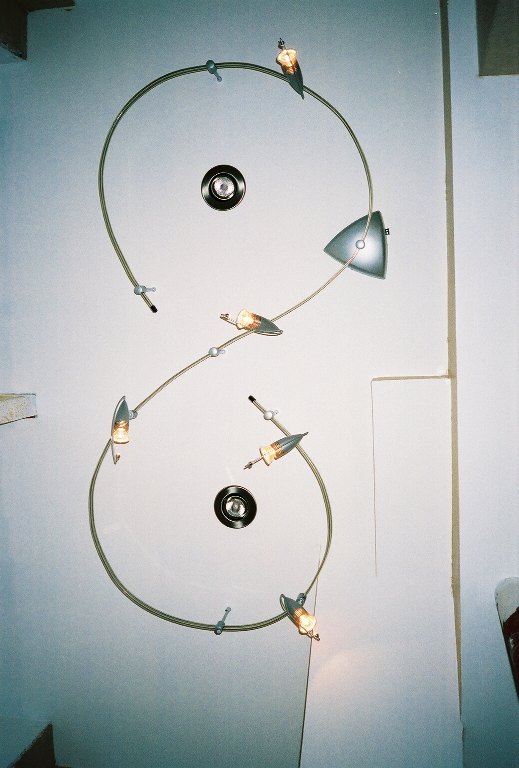
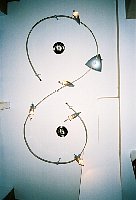
Looking straight up from the left side of the room, you'll see the lighting fixtures. The track lighting provides direct task lighting towards the built-in shelves and the two recessed directional lights in the center provide soft ambient lighting to the room.
CLICK ON PICTURE FOR LARGER VIEW
|
|
|
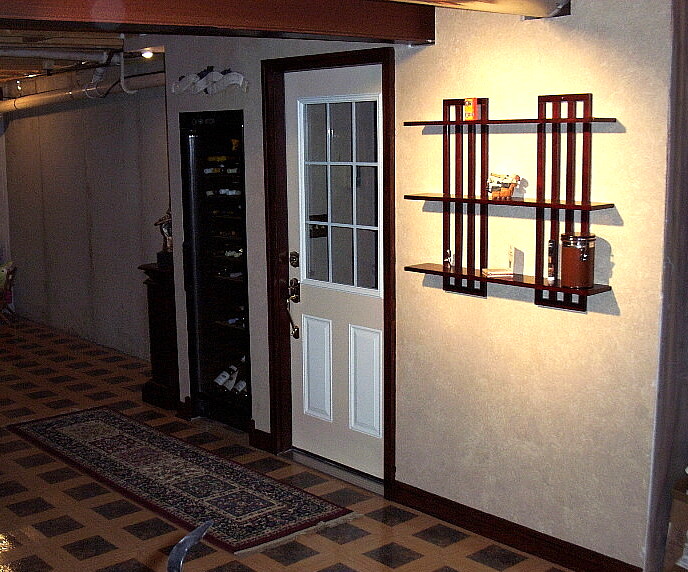
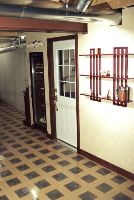
With the exception of the door color, the outside of the room is finished. Without the use of a flash in this picture, you can make out some of the texture on the wall surface. A few pieces of artwork will eventually complete the top left corner, and also the shelves on the right.
CLICK ON PICTURE FOR LARGER VIEW
|
|
|
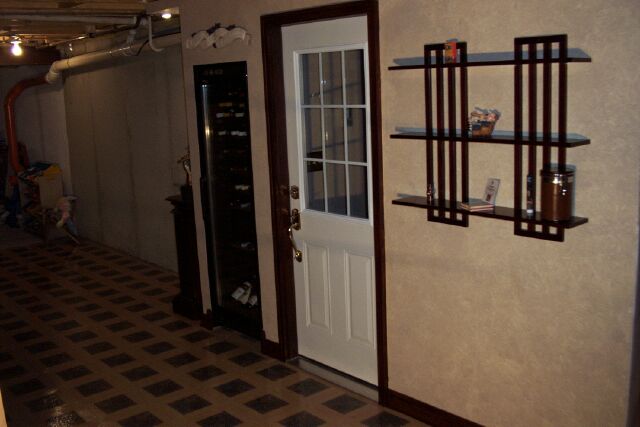
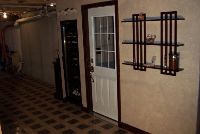
Looking on from the right.
CLICK ON PICTURE FOR LARGER VIEW
|
|
|
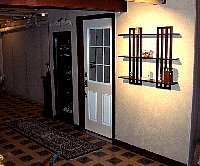
Another shot from the right, without a flash so you can see the wall finish better.
CLICK ON PICTURE FOR LARGER VIEW
|
|
|
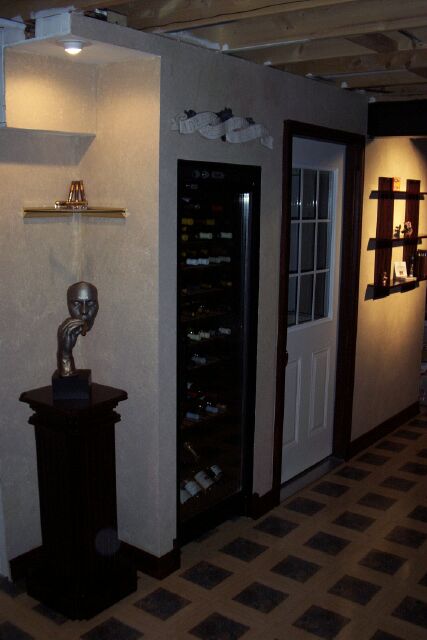
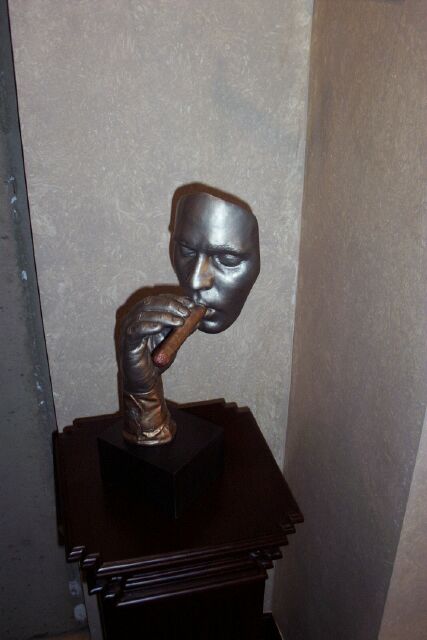
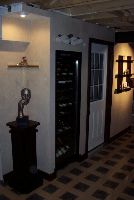
Here's the Austin Sculpture atop a solid mahogany pedastal. A small spotlight from above highlights the piece, as well as the glass shelf above it.
CLICK ON PICTURE FOR LARGER VIEW
|

|
|
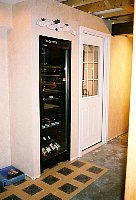
The outside room is finally finished. There's new paint on the door (two-tone), and a rug in front of the room. All that's left is some artwork to display on the shelves..
CLICK ON PICTURE FOR LARGER VIEW
|
|